Ubuntu’s 7th Birthday

On Oct 20th, 2004 Mark Shuttleworth and his team announced the initial version of Ubuntu, UBUNTU 4.10. Ubuntu is a fork of the Debian project’s codebase. The original aim of the Ubuntu team was to create an easy-to-use Linux desktop with new releases scheduled on a predictable six-month basis, resulting in a more frequently updated system. Ubuntu’s first release was on 20 October 2004. Since then, Canonical has released new versions of Ubuntu every six months with commitment to support each release for eighteen months by providing security fixes, patches to critical bugs and minor updates to programs. It was decided that every fourth release, issued on a two-year basis, would receive long-term support (LTS). LTS releases are supported for three years on the desktop and five years on the server.
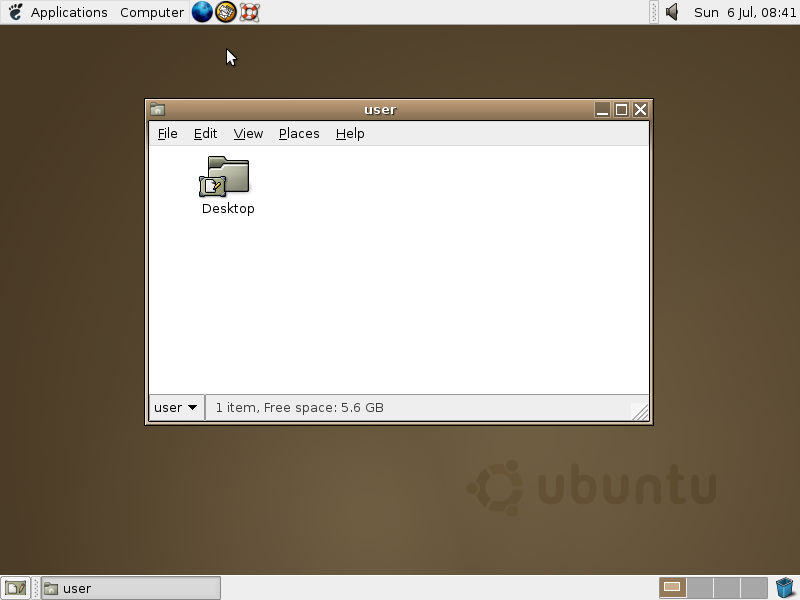

Ubuntu 4.10 Screenshot

Applications:

  • GNOME 2.8 (Yes, GNOME 2.8)
  • Firefox 0.9
  • OpenOffice.org 1.1.2
  • Gaim instant messenger 1.0 (Gaim would later become Pidgin)
  • GIMP 2.0
  • Floppy Formatter
  • Naming Convention:
    ‘Warty Warthog’ was so named because of the short amount of time in which it was put together, resulting in release lacking ‘polish’

    If you like to experiment Ubuntu 4.10, Click here to download

    How To Upgrade From Ubuntu 11.04 To Ubuntu 11.10

    The latest version of Ubuntu 11.10 is out few hours back. If its a fresh installtion, you can download from Ubuntu Site or download from here

    To upgrade from ubuntu 11.04 to ubuntu 11.10, follow the procedure

    1. To start the upgrading process, Press ALT+F2, type update-manager –d and press Enter
    Note: You can also you Terminal for the same.

    2. This will open the Update Manager where an upgrade button will be visible with a message that the new Ubuntu release is available for upgrade. Click Upgrade to continue.

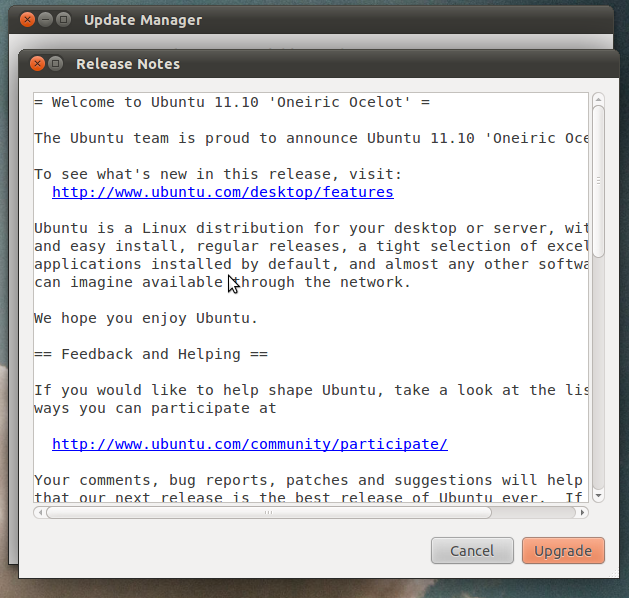
    3. Shortly after continuing, Release Notes window will be visible. Click Upgrade to initiate the upgrade process.

    4. Just before the upgrade, you will be asked to enter your password, after which the upgrade process will initiate.

    5. During the process, it will list out install files, no longer needed files, no longer supported by canonical files, Remove files and upgrade files. Click Start Upgrade to continue. Update will take time depending upon your internet connection speed.

    6. Once the the upgrade is complete, you will be prompted to restart your computer for the changes to take effect.That’s it you have successfully completed the process.

    Geekphilip tips:
    1. Make sure, you take backup of your files
    2. You can cancel the download, any time you like. When you try again, it will resume from the same location.
    3. Make sure, you don’t halt the upgrade process once the installation process begins.